Published by PitchChanger · Updated · How these guides are made
Hear the difference
Compare the authored A–B–C source with C–A–B rendered by the current cutter engine.
Pause your workspace preview before comparing these clips.
Original synthetic material. The settings below distinguish authored inputs from processed outputs; no performer or physical-device test is implied.
How to use this workflow
Create the pieces before moving them
Load the source in Audio Cutter. For the example below, leave Snap to beats off and Crossfade at 0 ms. Set Output cursor (ms) to 2000 and choose Split (S), then split at 4000.
Move the last piece to the front
Select the third segment and choose Earlier twice. Check its source interval: it should still identify the original 4–6 second material.
Generate and inspect the arrangement
Choose Preview joined audio, listen across both joins and Download WAV. If you edit again, generate a fresh result before saving.
Keep a map from output time to source time
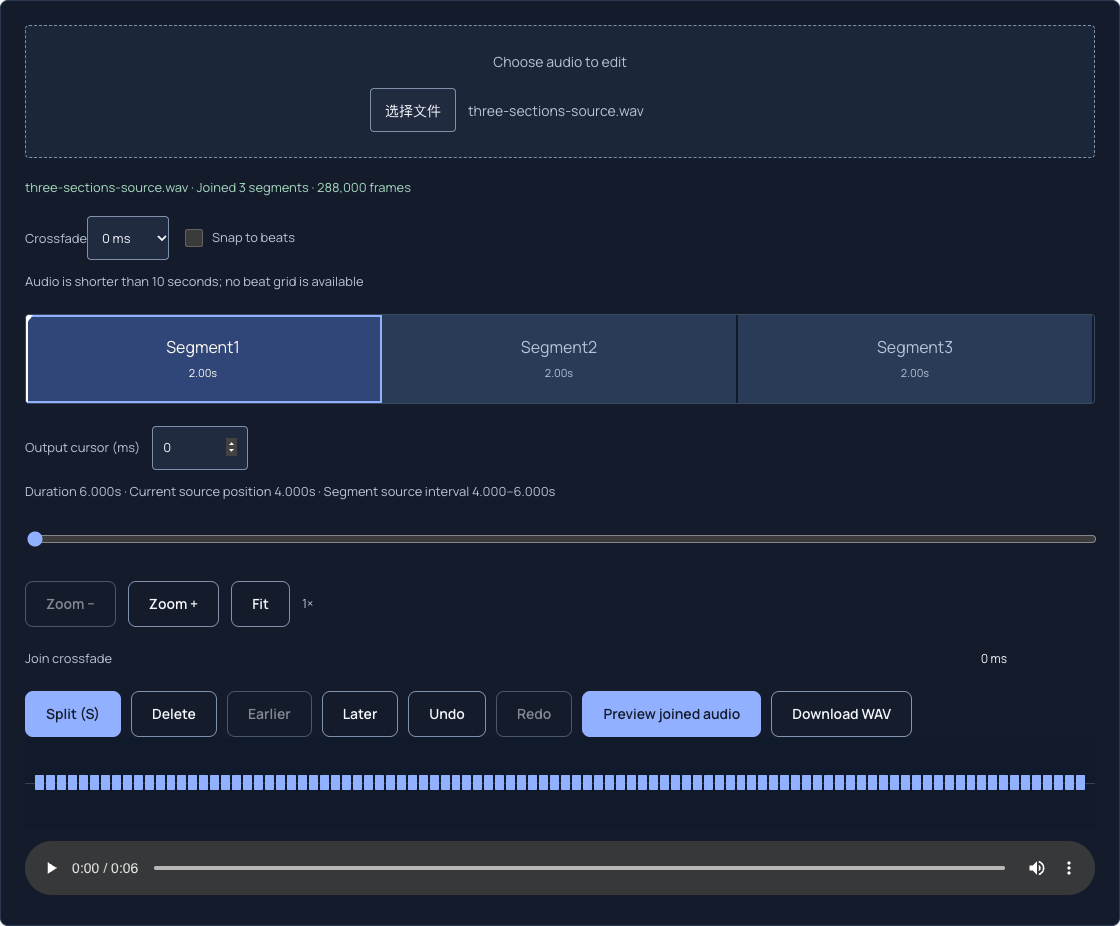
Our original six-second source contains A at 220 Hz, B at 330 Hz and C at 440 Hz, each lasting two seconds. The shared cutter renderer produced C–A–B with crossfade disabled. The result contains 288,000 frames at 48 kHz, the same six-second total as the source.
The same order was also exported through the actual browser interface. That downloaded WAV is byte-for-byte identical to the shared-renderer reference linked above. The screenshot preserves the selected source interval, output duration and export controls from that run.
Swipe or scroll sideways to read all columns.
| New output position | Section | Original source interval |
|---|---|---|
| 0–2 s | C | 4–6 s |
| 2–4 s | A | 0–2 s |
| 4–6 s | B | 2–4 s |
Check source labels rather than segment numbers
Segment 1 means first in the current arrangement. It is not a permanent name for the original opening. After a move, use the displayed Segment source interval and Current source position to confirm which material you selected.
Earlier and Later swap the selected segment with an adjacent one. Moving the last of three segments to the front therefore takes two Earlier actions. Undo lets you recover an incorrect order; it is not a permanent project save.
A reordered transition needs its own listening check
The downloadable reference uses the real shared renderer with crossfade 0 ms. Its distinct tones make order easy to verify, but a spoken phrase needs additional checks for breaths, word endings and room tone. Preserve a little context around each intended cut before deciding whether to fade.
Crossfade can smooth a new join using nearby source audio. It does not shorten the sum of the arranged segments in this cutter. Do not subtract a chosen 30 ms crossfade from each join when predicting duration.
When to move the work to a multitrack editor
This is one-source rearrangement. There is no second-file import, multitrack overdub or duplicate-segment button. For an intro recorded separately from an interview, use an editor that can import both sources. Save the rearranged WAV as an intermediate if you need additional editing or MP3 conversion.
Common questions
Can I move the chorus before the verse?
Yes, when both are in the same source file. Split their boundaries, select each retained piece and move it with Earlier or Later. Check transitions in the joined preview.
Will splitting delete any audio?
Splitting creates segment boundaries. Deleting a segment removes that piece from the arrangement; those are separate actions.